<?xml version="1.0" encoding="utf-8"?><feed xmlns="http://www.w3.org/2005/Atom" ><generator uri="https://jekyllrb.com/" version="3.10.0">Jekyll</generator><link href="https://junypr.github.io/feed.xml" rel="self" type="application/atom+xml" /><link href="https://junypr.github.io/" rel="alternate" type="text/html" /><updated>2026-06-01T00:28:06+00:00</updated><id>https://junypr.github.io/feed.xml</id><title type="html">Alex Ding</title><subtitle>Portfolio of Alex Ding, MIT &apos;28 computer science student.</subtitle><author><name>Alex Ding</name></author><entry><title type="html">Nasa Ames Unitary Plan Wind Tunnel Internship</title><link href="https://junypr.github.io/projects/2025/05/02/NASA-Ames-Unitary-Plan-Wind-Tunnel-Internship.html" rel="alternate" type="text/html" title="Nasa Ames Unitary Plan Wind Tunnel Internship" /><published>2025-05-02T00:00:00+00:00</published><updated>2025-05-02T00:00:00+00:00</updated><id>https://junypr.github.io/projects/2025/05/02/NASA-Ames-Unitary-Plan-Wind-Tunnel-Internship</id><content type="html" xml:base="https://junypr.github.io/projects/2025/05/02/NASA-Ames-Unitary-Plan-Wind-Tunnel-Internship.html"><![CDATA[<p>Characterizing the uncertainty in a stereophotogrammetry system used by the NASA Ames Unitary Plan Wind Tunnel to measure model angle of attack. Mentored by Ted Garbeff and Lindsey Drone.</p>

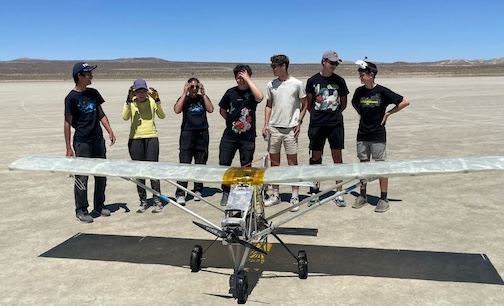
<p><img src="/assets/images/UPWT.jpg" alt="" />
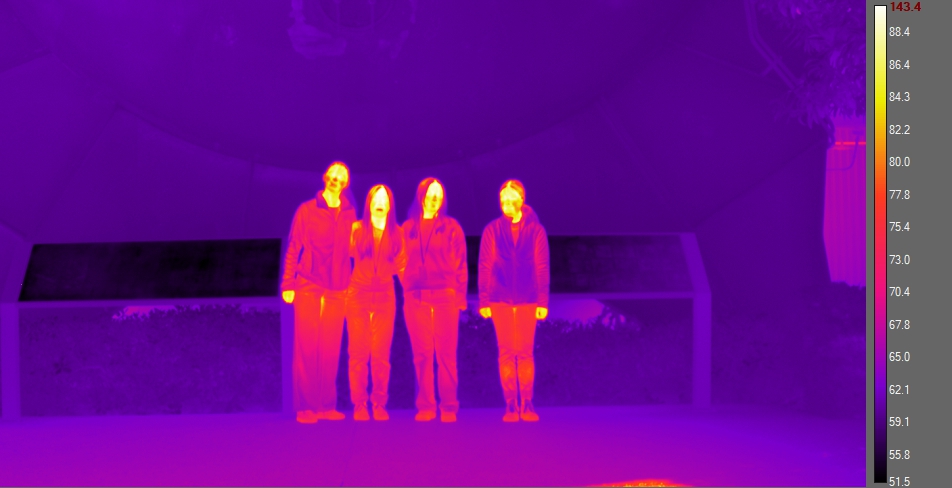
(some of the interns in IR)</p>

<p>I started by getting familiar with Ted’s camera and light setup, the hexapod (a platform with 6 degrees of freedom and 0.00001mm accuracy) and OpenCV in Python. I spent some time blazing through computer vision textbooks — I hadn’t done anything with computer vision before, so I had to learn a lot.</p>

<p>I wrote a suite of detection and refinement methods using OpenCV’s functions: blob detection, Harris corner detection, convolution, and ellipse fit refinement, centroiding, corner refinement, and a special convolution refinement algorithm Ted devised. I wrote methods to triangulate points and convert from the camera reference frame to the hexapod’s. I also experimented with camera calibration — and realized that it was far finickier than expected.</p>

<p>The other interns and I about a dozen targets of different shapes and sizes with an airbrush and Cricut stencils. I started taking my own data. I did experiments to determine the system’s accuracy in measuring motion of a few mm with different targets.</p>

<p>I realized that to get a better picture of the error in the system, I wanted a lot of precise data points, that I could take quickly. So I used different calibration boards (checker pattern and dot pattern) and measured the positions of the dots relative to each other with the cameras, then compared the results to the board’s specs. I found that the accuracy depended a lot on the calibration I used, and that errors were systematic (some parts of the board all skewing one way, for example) so I used multiple pictures of the same board in the exact same position to determine error from noise, and then dived deeper into calibration.</p>

<p>I took several thousand photos of a checker calibration board in different positions and used that as the raw data to run a Monte Carlo simulation on camera calibration. Combining that with the measured error from noise, I input all the errors into a Monte Carlo simulation on triangulation, and found that error in camera calibration had the largest effect on error in triangulation results.</p>

<p>I did other experimenting to see the effects of other possible variables: like vibration (I convinced two test engineers, the interns, and Lindsey to jump up and down in sync with me in the lab), binning, and lighting.</p>

<p><a href="https://drive.google.com/file/d/1A-Rncfb17Ya3Z-CIl4nMNU3zIlAfGhYu/view?usp=drive_link">The presentation I gave to the NASA Ames Aeronautics division at the end of my internship.</a> It had cooler animations in powerpoint.</p>

<p>I spent a fair amount of time making sure that the code I wrote was well documented, in the hopes that it’ll be used in the future (because it’s free! and matlab isn’t!). I used multiprocessing with the detection methods so I could process many images in parallel, speeding up my data analysis (the images were each ~50mb, so any speedup helped a lot). I also optimized the original convolution refinement code I wrote to take advantage of arrays, finally getting it to similar speeds as OpenCV’s other detection / refinement methods.</p>

<p>Despite this, my poor intern loaner laptop hit 100% CPU frequently. During some Monte Carlo runs (camera calibration, ahem), I left it running for a few hours to go explore other NASA labs or the wind tunnels!</p>

<p>Cool things I got to see (that I’m allowed to post):</p>
<ul>
  <li>Schlieren (shadowgraph) — we popped balloons and played a trumpet and watched the sound waves with a high speed camera</li>
  <li>the Vertical Gun Range, which I wouldn’t describe as a gun but more like a cannon that simulates asteroid impacts, capsules descending, etc.</li>
  <li>the super computing facility</li>
  <li>the largest wind tunnel in the world</li>
  <li>an anechoic RF chamber</li>
  <li>the lead screw that adjusts the floor of the wind tunnel, changing its mach number</li>
</ul>

<p>I also had time to take cool photos with the wind tunnel’s IR camera and make a 3D music video using the camera setup (see the end of the <a href="https://drive.google.com/file/d/1A-Rncfb17Ya3Z-CIl4nMNU3zIlAfGhYu/view?usp=drive_link">presentation</a>!).</p>]]></content><author><name>Alex</name></author><category term="projects" /><summary type="html"><![CDATA[Characterizing the uncertainty in a stereophotogrammetry system used by the NASA Ames Unitary Plan Wind Tunnel to measure model angle of attack. Mentored by Ted Garbeff and Lindsey Drone.]]></summary></entry><entry><title type="html">Oystermaran</title><link href="https://junypr.github.io/2024/10/02/oystermaran.html" rel="alternate" type="text/html" title="Oystermaran" /><published>2024-10-02T00:00:00+00:00</published><updated>2024-10-02T00:00:00+00:00</updated><id>https://junypr.github.io/2024/10/02/oystermaran</id><content type="html" xml:base="https://junypr.github.io/2024/10/02/oystermaran.html"><![CDATA[<p>An oyster-basket-flipping robotic boat being developed in MIT’s Sea Grant Lab. I designed and manufactured PCBs and helped debug electronics for.</p>

<p><img src="https://lh7-rt.googleusercontent.com/docsz/AD_4nXfxkyzj3aUzDrogEklRlDAAstseOi5tr4zklsufLVwD5a84drtWfS9ks7NM2mmeBwD0X7oQgRsJR1p6IL_N7dOvlU_5w8Xa17lPhaPZ1zGFTII07gycIChddlqyvcOxEF984_9MdA?key=Ha2FaEYBJfOpT1mNwuupPQ" alt="" /></p>
<h1 id="fall-2024">Fall 2024</h1>
<p>I learned KiCAD and designed a simple PCB for Flippy to connect signals from the Pixhawk and Raspberry Pi, replacing the previous protoboard. I routed the traces by hand to ensure the PCB was one-sided, since we wanted to manufacture the PCB on-site. I learned how to use an Othermill, <a href="https://photos.fife.usercontent.google.com/pw/AP1GczMKqAKQv43_0fszGVaWvvuxDIscWP1PbXgTXzYVHSipH7urvzanGlys_g=w3260-h2445-s-no-gm?authuser=0">milled the PCB</a> (several times, because I got it wrong a lot!), then soldermasked and soldered it.</p>
<h1 id="spring-2025">Spring 2025</h1>
<p>I helped debug the electronics system, allowing us to complete a test in Sea Grant’s tank.</p>

<p>I designed a mount to hold the Pixhawk, GPS, PCB, Raspberry Pi, battery terminals, and other electronics within a waterproof box. I lasercut the mount and other metal parts, on a Fablight.</p>

<p>I <a href="https://drive.google.com/file/d/1jA8feYpc5yx-DXKo-DtRHNTpLUZFonQV/view?usp=drive_link">experimented with using an I2C breakout board from Adafruit to control servos</a>, and designed yet another PCB that integrated the I2C breakout. We ordered them from PCBway; I soldered and installed one onto Flippy.</p>]]></content><author><name>Alex Ding</name></author><summary type="html"><![CDATA[An oyster-basket-flipping robotic boat being developed in MIT’s Sea Grant Lab. I designed and manufactured PCBs and helped debug electronics for.]]></summary></entry><entry><title type="html">Misc Projects</title><link href="https://junypr.github.io/projects/2024/09/24/misc-projects.html" rel="alternate" type="text/html" title="Misc Projects" /><published>2024-09-24T00:00:00+00:00</published><updated>2024-09-24T00:00:00+00:00</updated><id>https://junypr.github.io/projects/2024/09/24/misc-projects</id><content type="html" xml:base="https://junypr.github.io/projects/2024/09/24/misc-projects.html"><![CDATA[<p><img src="/assets/images/Flower.png" alt="" /></p>

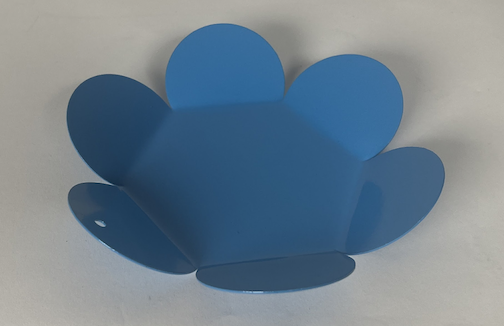
<p>Sheet metal flower bowl laser-cut on a Fablight and powder-coated.</p>

<hr />

<p><img src="/assets/images/FPOP.png" alt="" /></p>

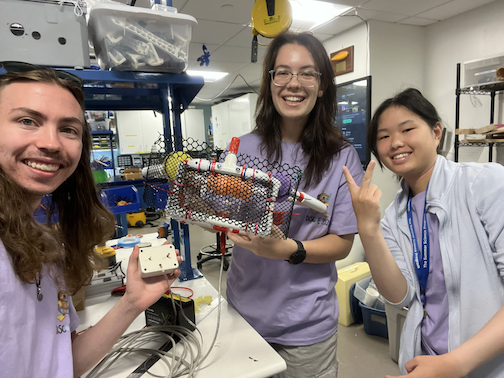
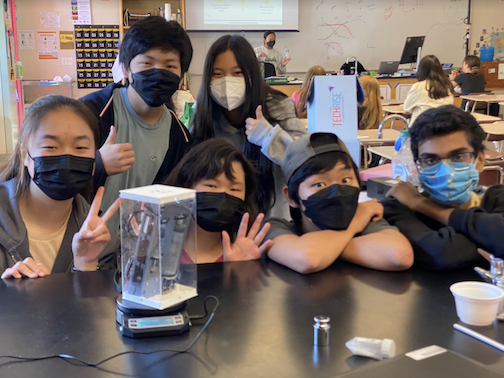
<p>Sea Perch built as part of MIT’s Discover Ocean Engineering FPOP. A tethered aquatic robot with thrusters designed to compete to pop balloons and gather floating objects. We won third place!</p>

<hr />

<p><img src="/assets/images/shirts.png" alt="" /></p>

<p>Shirts made with cnc embroidery machine (<a href="https://photos.google.com/photo/AF1QipMkGNmTI6777UhbPp0xkchwOFOWb-K7a1hrjZXW">video!</a>).</p>]]></content><author><name>Alex</name></author><category term="projects" /><summary type="html"><![CDATA[]]></summary></entry><entry><title type="html">Design Build Fly</title><link href="https://junypr.github.io/projects/2024/09/10/design-build-fly.html" rel="alternate" type="text/html" title="Design Build Fly" /><published>2024-09-10T00:00:00+00:00</published><updated>2024-09-10T00:00:00+00:00</updated><id>https://junypr.github.io/projects/2024/09/10/design-build-fly</id><content type="html" xml:base="https://junypr.github.io/projects/2024/09/10/design-build-fly.html"><![CDATA[<p>A team of MIT students building RC planes for the AIAA’s design/build/fly competition.</p>

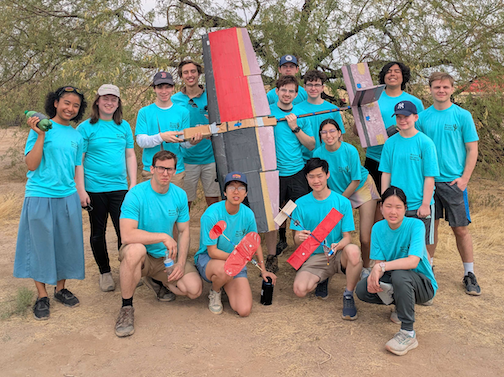
<p>Website: <a href="https://web.mit.edu/dbf/www/">https://web.mit.edu/dbf/www/</a></p>

<p><img src="/assets/images/DBF.png" alt="" /></p>

<h1 id="fall-2024">Fall 2024</h1>
<p>We built small balsa gliders and <a href="https://photos.fife.usercontent.google.com/pw/AP1GczPE7GoR4OznoFX3C11uXpBPQHe35fhCwbed34B8u-nffjMrS1n2niXjjA=w3260-h2445-s-no-gm?authuser=0">larger RC aircraft</a> as part of DBF’s new member training. Our wobbly wing-fuselage attachment caused it to <a href="https://photos.google.com/photo/AF1QipNgvEvfnV4KIrwAhKR6gxvI8QRDwDue5OmDkw0L">crash</a>.</p>

<p>Our mission requirements for the year’s competition involved creating an autonomous glider that could hit a target, so I helped brainstorm glider configurations. I did some back-of-the-envelope calculations to figure out the lift-drag ratio we’d need.</p>

<p>I helped with fabrication, including monokoting the wing and laying up the tail in fiberglass, for the first test flight.</p>

<p>We had our first test flight at the end of the semester! The plane had no dihedral and an essentially non-existent fuselage, so it was neutrally stable and required attentive piloting. It <a href="https://photos.google.com/photo/AF1QipNuxspf6d7MaqV82yVmoGNHe6bIbu5GnnhcurE6">flew several laps successfully</a>.</p>
<h1 id="spring-2025">Spring 2025</h1>
<p>We decided to build a glider in the conventional configuration, so I built <a href="https://photos.google.com/photo/AF1QipOjgtzB5Aa2wFNig3br6XbG52n0MNU3YRM_3Cna">several gliders</a> with different methods to see what would be lightest. We tried testing the gliders, including by dropping them from a drone, but found that it was difficult to find a reliable way to release the glider.</p>

<p>I wrote the airfoil selection section in our design doc.</p>

<p>I spent a lot of time helping build two more aircraft to test fly, and spare parts to bring to competition to ensure we’d be able to recover from a crash.</p>

<p>At competition, I helped fix last minute problems (like a screw that just wouldn’t come out from a broken motor, and the glider release mechanism that kept sticking) and talked to other teams. Although we didn’t perform as well as I would’ve liked at competition (we were late in the flight order because we accidentally added extra empty pages to our design doc, so we had fewer attempts to fly), I still had fun and learned a lot.</p>

<p>I’m currently aerodynamics subteam co-lead and am learning AeroSandbox for next year!</p>]]></content><author><name>Alex</name></author><category term="projects" /><summary type="html"><![CDATA[A team of MIT students building RC planes for the AIAA’s design/build/fly competition.]]></summary></entry><entry><title type="html">Summer Science Program</title><link href="https://junypr.github.io/projects/2023/06/17/summer-science-program.html" rel="alternate" type="text/html" title="Summer Science Program" /><published>2023-06-17T00:00:00+00:00</published><updated>2023-06-17T00:00:00+00:00</updated><id>https://junypr.github.io/projects/2023/06/17/summer-science-program</id><content type="html" xml:base="https://junypr.github.io/projects/2023/06/17/summer-science-program.html"><![CDATA[<p>My team observed near earth asteroid 2002 MQ3, reduced images, found right ascension and declination, and determined its orbit using the Method of Gauss. </p>

<p><img src="/assets/images/SSP.png" alt="" /></p>

<p>I wrote several more times code at SSP than I ever have. Much of it was translating equations that we had gone over during lecture into python, which was theoretically simple but very hard to debug. </p>

<p><a href="https://drive.google.com/file/d/1D2KQCqI7DquNSFY8Y0MveyJNwI-0xAIG/view?usp=drive_link">Least squares plate reduction</a> (LSPR) was the first program we wrote specifically for processing our data. It turns x, y coordinates on a .fits image into right ascensions and declinations using known stars. Compared to the others it wasn’t too complicated; the hardest part was translating the sums into for loops.</p>

<p><a href="https://drive.google.com/drive/folders/1sx6ubxOH76AOT62bse6_UbrpQUU0Q5Ok">Aperture photometry</a> compares the signal of our asteroid to that of known reference stars to find its apparent magnitude. It was difficult because of centroiding — it was riddled with off-by-one errors and difficult to debug because wrong results seemed accurate. I also accidentally swapped x and y when slicing out the region of interest, and spent an hour wondering why my signal was negative, until our TA Kathryn explained. The actual mathematics to calculate signal and noise wasn’t difficult, though I had to be careful when selecting my stars to create the line of best fit; here’s one of my <a href="https://docs.google.com/document/d/15xx77QHa-d-DKdPKiT9Yj9c3IzwNIaQ4XkDESzsG3FM/edit?usp=sharing">write-ups of the results</a>. </p>

<p>Programming the Method of Gauss to determine our asteroid’s orbit started with a <a href="https://drive.google.com/file/d/1LKMg0kuV8ZurVbsU6ZWHPlsD24l0pTT_/view?usp=drive_link">long pseudocode</a>, then extensive debugging. In my first few attempts I converted from Gaussian time into regular time at the wrong step, which resulted in my orbital elements being slightly off and my f &amp; g functions not working for some inputs. Our asteroid converged after over 60 iterations (which would be really, really annoying to have to calculate by hand). </p>

<p>After writing the Method of Gauss, I attempted orbit improvement, which was actually successful as it decreased the root mean square of the predicted orbit — interesting, since the other group observing 2002 MQ3 didn’t find orbit improvement helpful. I also chose to use multiprocessing via Python’s multiprocessing library to create a monte carlo program estimating the error on our orbital elements given the error on our original right ascensions and declinations. With 1 million runs, I got some <a href="https://drive.google.com/file/d/1pV1RmBW9W_AV3_Z2CPPUs6xSGnZNXvff/view?usp=drive_link">nice bell curves of each of the orbital elements</a>. </p>

<p><a href="https://drive.google.com/file/d/1dCCt31AL9HNcmQ-BGcFvC0et0yPqoGnH/view?usp=drive_link">Final Monte Carlo method on the Method of Gauss with multiprocessing and orbit improvement</a></p>

<p><a href="https://docs.google.com/document/d/1IEa5u4rfKcvwZofLpTXpwqClvEkHZFVTPYuy8kCcpEQ/edit?usp=sharing">Final orbit determination report</a></p>]]></content><author><name>Alex</name></author><category term="projects" /><summary type="html"><![CDATA[My team observed near earth asteroid 2002 MQ3, reduced images, found right ascension and declination, and determined its orbit using the Method of Gauss. ]]></summary></entry><entry><title type="html">Nasa Techrise</title><link href="https://junypr.github.io/projects/2021/08/31/nasa-techrise.html" rel="alternate" type="text/html" title="Nasa Techrise" /><published>2021-08-31T00:00:00+00:00</published><updated>2021-08-31T00:00:00+00:00</updated><id>https://junypr.github.io/projects/2021/08/31/nasa-techrise</id><content type="html" xml:base="https://junypr.github.io/projects/2021/08/31/nasa-techrise.html"><![CDATA[<p>A six-person team of Aragon students who won the NASA TechRise Challenge. We’ve designed and built an experiment that monitors the breakdown of hydrogen peroxide catalyzed by potassium iodide in microgravity. Our experiment is complete, shipped to NASA, and awaiting launch on Blue Origin’s New Shepard.</p>

<p>Website: <a href="https://www.futureengineers.org/nasatechrise2021/gallery/51651">https://www.futureengineers.org/nasatechrise2021/gallery/51651</a> </p>

<p><img src="/assets/images/NASA.png" alt="" /></p>
<h1 id="fall-2021">Fall 2021</h1>
<p>We brainstormed many ideas for a proposal, then ranked each based on the competition criteria. I did an experiment in my AP Biology class observing the efficacy of catalase under different temperatures and pH levels, so I suggested we do a similar experiment in microgravity, which was the idea we chose to use. We ran <a href="https://drive.google.com/file/d/1kR8xKX2UInRivzZZe2LFIEDXJyPtduGh/view?usp=share_link">a version of the experiment</a> to see how it might work, and decided to use resistance to measure how much oxygen gas was being produced. We <a href="https://cad.onshape.com/documents/883287bd57fbaa5056bf3a2d/w/ddf9bfef1811d341a83d56e3/e/35227c6baf0f57c89ab86608">CADed a design</a> with two syringes and a reaction chamber and submitted our proposal.</p>
<h1 id="spring-2022">Spring 2022</h1>
<p>After we learned that we won, we immediately started talking to teachers about polishing our experiment. Ms. Ward, the AP Biology teacher, brought to our attention that catalase was not shelf stable. We looked into ways to stabilize the enzyme, including adding glucose and glycerol, since the experiment would be in storage for months before the launch. We tried adding glycerol to catalase and leaving it at room temperature, but the catalase degraded, so we switched to potassium iodide. </p>

<p>Our chemistry teacher Mr. Doyle recommended that we measure volume and pressure in order to calculate the amount of oxygen, rather than resistance, which would be affected by ions generated during the reaction. He demonstrated to us the upside down burette method, then we did o<a href="https://drive.google.com/file/d/1lt1T4D9A-Mw3fx6e_5cztLyfoyag5V0C/view?usp=drive_link">ur own version of the experiment using potassium iodide and hydrogen peroxide</a> with the help of Mr. Moretti. I did the <a href="https://drive.google.com/file/d/1Fcq1xNlFjgVjWCPFFs1RVvivLvy_cRfj/view?usp=drive_link">stoichiometric calculations</a> to see how much hydrogen peroxide we should use, and researched the <a href="https://drive.google.com/file/d/1ntELYJEjcXLB71bCzulTn8-QlXEt9Nm-/view?usp=drive_link">Van Der Waals equation</a> and <a href="https://drive.google.com/file/d/17fUhpgKheBUzYgB99TabJUBF7gmfdxq5/view?usp=drive_link">Henry’s law</a> to derive equations to calculate the total amount of oxygen produced. </p>

<p>We went through several iterations of the design: <a href="https://drive.google.com/file/d/1xNNi8LzvhDotWhVi08P8v2LnFmGPRMfC/view?usp=drive_link">a syringe and a large reaction chamber</a> and <a href="https://drive.google.com/file/d/1Yo6EMFohAJz8Mo0dcthtGTgwme67P9gB/view?usp=drive_link">two syringes with a test tube</a> before deciding to use <a href="https://drive.google.com/file/d/1Yo6EMFohAJz8Mo0dcthtGTgwme67P9gB/view?usp=drive_link">two syringes</a>, the larger one carrying hydrogen peroxide and serving as the reaction chamber, and the smaller carrying potassium iodide. We built it — and then struggled to make it leak proof. After unsuccessfully trying caulking, our NASA mentors introduced us to Luer Locks, and Mr. Apperson, our shop teacher, showed us PTFE tape. We conducted <a href="https://drive.google.com/file/d/1i9aVXoEJZgiy3cZPimCUqQccEVcXsYcR/view?usp=share_link">lots of tests</a> until the experiment stopped leaking. At the end of it I learned to iterate, iterate, iterate. We failed. Many times. </p>

<p>We 3D printed our mount out of PETG. I tried a <a href="https://cad.onshape.com/documents/883287bd57fbaa5056bf3a2d/w/ddf9bfef1811d341a83d56e3/e/c506fb46e782a85f0de347a8">clamp design</a> originally, but <a href="https://cad.onshape.com/documents/883287bd57fbaa5056bf3a2d/w/ddf9bfef1811d341a83d56e3/e/ab4777abb0003c9c09c7d2c6">we settled for zip ties</a> that Jorell designed. Designing the tolerances was a struggle because <a href="https://drive.google.com/file/d/136-G5eP8XqjIlSp9-zEFhFwVHEG0H9R4/view?usp=share_link">PETG does not print cleanly</a> — at one point Jorell used a blow torch and screwdriver to widen the zip tie slots.</p>

<p>As our electronics arrived, we started testing and designing the mechanism to depress the small syringe. We tried a <a href="https://cad.onshape.com/documents/883287bd57fbaa5056bf3a2d/w/ddf9bfef1811d341a83d56e3/e/60b6005c61ed1d9d610fabc3">push-pull bar</a> and even considered a four bar linkage before I designed a <a href="https://cad.onshape.com/documents/883287bd57fbaa5056bf3a2d/w/ddf9bfef1811d341a83d56e3/e/f080299fea6aa91cc59d69e3">screw gear</a>. However, the bevel gears that connected the stepper to the stepper motor kept <a href="https://drive.google.com/file/d/1t-PV66HqfmQ_mNcvvbEMp7EsDqWzwxqv/view?usp=share_link">skipping teeth</a> and the motor did not have enough torque. </p>
<h1 id="summer-2022">Summer 2022</h1>
<p>By the end of the school year, we had a <a href="https://drive.google.com/file/d/183EmxHwqvOkUBwPmIbMkcIacFBBICML1/view?usp=share_link">mostly working prototype</a>. We continued to test for leaks, and strength tested our setup by putting everything together and throwing it around (unfortunately, <a href="https://drive.google.com/file/d/1eSf7jtp8g-rFptCmx4PtcjiwuYUSTjpl/view?usp=share_link">our mount just barely didn’t fit inside the flight box</a>). Meanwhile we noticed that the hydrogen peroxide was corroding our brass NPT fittings and our solenoid valve.</p>

<p>Rachel worked on the code, and Jake soldered, so by the end of the summer, <a href="https://drive.google.com/file/d/1Bi81sI198UgGASPhPMQdUsL7JRLUAuns/view?usp=share_link">our sensors were working as well</a>.</p>

<h1 id="fall-2022">Fall 2022</h1>
<p>We <a href="https://drive.google.com/file/d/1i8qgFtO4rtXYlcFvPeYxEG1nDr3mr7X_/view?usp=share_link">printed our final mount</a>, <a href="https://drive.google.com/file/d/16DbWVMZN3L7ftXLoHTf1-GB2zGHWJlXk/view?usp=share_link">finally got everything to fit inside</a>, and staked and potted our electronics. We tried to fix the corrosion on the NPT fittings by coating them with polyurethane, which didn’t work, so we switched to plastic NPT fittings. We couldn’t find a plastic solenoid, so we left an air gap between the hydrogen peroxide and the solenoid. </p>

<p>We got a DC motor with more torque and <a href="https://cad.onshape.com/documents/883287bd57fbaa5056bf3a2d/w/ddf9bfef1811d341a83d56e3/e/2cb588ee3b84cc494f521c16">fixed our screw gear</a>, removing the bevel. A little bit of graphite to lubricate and it worked! </p>

<p>The last few weeks were focused on soldering, testing, and screwing everything together — including last minute runs to Ace Hardware when we realized a screw was missing. Thankfully the switch to plastic NPT fittings left us nicely under the 500g limit. We shipped October 19. </p>

<p>Our experiment was set to launch on Blue Origin’s New Shepard sometime early 2023. Unfortunately, as of right now, due to the New Shepard being grounded, the experiment has not been launched.</p>]]></content><author><name>Alex</name></author><category term="projects" /><summary type="html"><![CDATA[A six-person team of Aragon students who won the NASA TechRise Challenge. We’ve designed and built an experiment that monitors the breakdown of hydrogen peroxide catalyzed by potassium iodide in microgravity. Our experiment is complete, shipped to NASA, and awaiting launch on Blue Origin’s New Shepard.]]></summary></entry><entry><title type="html">Flight Club Aerospace</title><link href="https://junypr.github.io/projects/2020/12/21/flight-club-aerospace.html" rel="alternate" type="text/html" title="Flight Club Aerospace" /><published>2020-12-21T00:00:00+00:00</published><updated>2020-12-21T00:00:00+00:00</updated><id>https://junypr.github.io/projects/2020/12/21/flight-club-aerospace</id><content type="html" xml:base="https://junypr.github.io/projects/2020/12/21/flight-club-aerospace.html"><![CDATA[<p>A group of about twenty high schoolers designing and building a pt. 103 ultralight aircraft! In my 3.5 years on the team as a design team member, and later, design co-lead, I worked on the design of a part 107 ultralight and the design and fabrication of a 12’ wingspan prototype.</p>

<p>Website: <a href="https://www.flightclubaerospace.com/">https://www.flightclubaerospace.com/</a></p>

<p><img src="/assets/images/FCA.jpg" alt="" /></p>

<h1 id="spring-2021">Spring 2021</h1>
<p>I was immediately tasked with simulating the fuselage for a full scale pt. 103 ultralight in Fusion 360’s FEA program. We started with <a href="https://drive.google.com/file/d/1k0rWzqBlvB0en9RMMx1ror6Hot8tMt_H/view?usp=share_link">simulations of lift at cruise</a> (<a href="https://drive.google.com/file/d/1qsv9YXSSb_nSMR01X08U0L0KXhxgQyJP/view?usp=share_link">my notes on the forces</a>), and went onto <a href="https://drive.google.com/file/d/1uEwXPGS9KGzTQHTEiIAydxL6bMCErehA/view?usp=share_link">simulating forces on every part of the fuselage</a>. Experimenting with Fusion simulation’s features — especially solving our last few simulations without constraints in rigid body mode — taught me a lot about breaking down forces and finding global equilibrium. </p>

<p>Our fuselage CAD was not perfect and the program had a <a href="https://drive.google.com/file/d/1TY1M8KLiKCm1M5PjhF8883r4ya-95Ts4/view?usp=share_link">tendency to fail meshing</a> — runtimes were around five hours per simulation when they did work — so we had some strange workarounds, including <a href="https://drive.google.com/file/d/1bd6iKu--12LBbtvCeZaRM2LhJnh0mSJO/view?usp=share_link">putting spheres on the joints and removing most of the crossmembers from the simulation.</a> The simulations showed us that we needed to <a href="https://drive.google.com/file/d/1mOsr1ZKgdjm1taH2qV3EwFrGq5aHE6Ex/view?usp=share_link">push the beams at the bottom of the cabin backward to create a strong attachment for the aft spar.</a> </p>

<p>Through the process we realized that our center of gravity was too far aft, which would make our plane unstable. We tried to remedy this by <a href="https://drive.google.com/file/d/1X4fQjOhGSo8m83_z-xHKa2cTDv7hJH2b/view?usp=share_link">elongating the nose</a>, but that didn’t fix the issue as much as we had hoped, opening up debate over switching to an aluminum fuselage, which would be lighter than the 4130 chromoly steel we had originally intended to weld. </p>

<p>Towards the end of March <a href="https://drive.google.com/file/d/1jjBfu6P_dPw3F66B8qKn7Eda84jepu1o/view?usp=share_link">we met with Professor Jeff Hasson of Texas Tech</a>, who suggested a few tweaks to the back of the cabin and doing <a href="https://drive.google.com/file/d/11M42z2eSSlgGWQFRIW1znkF494dtIfBQ/view?usp=share_link">simulations of roll forces</a>, but otherwise approved our design. <a href="https://drive.google.com/file/d/1TtZHC1mxq7TDbfGJTwEXb7NxD9PBvhxz/view?usp=share_link">Professor Shirmohamadi</a> also advised us on testing the wing attachment.</p>

<p>Overall, the process taught me to trust common sense before attempting to run something through a simulation — it’s faster that way. </p>
<h1 id="summer-2021">Summer 2021</h1>
<p>I started attending fabrication and learning shop skills — my first time doing so — mainly by building the wing. I enjoyed it, but design still remains my expertise.</p>

<p>After being elected Design Co-Lead, I led a subteam on control systems, designing the <a href="https://drive.google.com/file/d/10p7qs_jh0W-jvbTVHSxO18crMgM2ftvq/view?usp=share_link">bellcranks for the rudder and elevator</a> and researching cable strength. I also helped design the aileron bellcrank, doing some <a href="https://drive.google.com/file/d/1MObcpxydFfJ0BQ5DmIJhZE_M3DMSC1jL/view?usp=share_link">geometry</a> so the aileron would go up more than down, and making a <a href="https://drive.google.com/file/d/1l16oA8c9N3tUvshI9mKNSY7IjgRNUdCi/view?usp=share_link">cardboard mock-up</a> after the math got confusing. </p>

<p>We double checked our fuselage strength using a skewer and hot glue model, per the advice of some builders on the <a href="https://www.homebuiltairplanes.com/forums/threads/flight-club-ultralight-build-log.33380/page-20">homebuilt airplanes forum</a> — it worked! Moral of the story for both control systems and the fuselage: when in doubt, mock it up!</p>

<p>For the rest of summer I finished up small projects — <a href="https://docs.google.com/document/d/1Fne0iBvNF2WVOR-ujqOo3ZznYbZuPgm8ICLjXconpr0/edit?usp=sharing">designing braking for the landing gear</a>, finalizing CG and <a href="https://docs.google.com/document/d/1s3sfMhY70B3MJSwBjdkXZkfxQKeFSEF9Mgk_KZULIpY/edit?usp=sharing">pilot placement</a>, and selecting a <a href="https://docs.google.com/document/d/1oM-beLKeIKhmvq1ipgnmTRviSsy-p1_LyFe6L3Lc0pA/edit?usp=sharing">ballistic recovery system</a>. We also redesigned the tail to improve static stability using <a href="https://drive.google.com/file/d/19vsuw1uuMe4-ZZdsfOZ7lyZmJK8PXfWN/view?usp=share_link">XFLR5</a>, which taught me about moments and aerodynamic coefficients. I did <a href="https://drive.google.com/file/d/1anAE_FA3T9vnDHxwPx5h4gLBXnBe90Fs/view?usp=drive_link">tail volume coefficient calculations</a> to do a gut check on XLFR5’s results. We decided on a <a href="https://drive.google.com/file/d/1vetR-qQk6DkLflWMzbFb6F81leMi01bE/view?usp=share_link">negative camber airfoil</a> which was not ideal, but kept the tail reasonably sized. </p>

<p>I cozied up to the General Aviation Aircraft Design textbook to <a href="https://drive.google.com/file/d/1etQG8XGHQhJRyE-SbHnvKk2ZH1Ae67NO/view?usp=drive_link">estimate drag</a> so we could spec the motor. </p>
<h1 id="fall-2021">Fall 2021</h1>
<p>After training new recruits, I worked on the <a href="https://docs.google.com/document/d/1e69rXSm8YgRfyvE0DwACHyiFgTpYllw88y9ySdEOSn8/edit?usp=sharing">landing gear</a>, namely <a href="https://drive.google.com/file/d/17zRWfjwMxuUxp3KH_CShl_rH_rv9oKZx/view?usp=drive_link">calculating the force</a> of impact to choose a spring. We didn’t finish, because in mid-August we met with <a href="https://drive.google.com/file/d/1xO9mrkBiQLQ3inlu-WrgGVDLaQozfV95/view?usp=share_link">Jump Aero</a>, who told us that our front spars would probably break at high angles of attack. After a lot of heated debate, we decided to switch to designing a subscale prototype, which meant <a href="https://drive.google.com/file/d/11puioe7DWuckUhhTbx2mJC93jeA8_3dM/view?usp=share_link">redoing our XFLR5 simulations</a> and adjusting the tail size. I found that Reynolds scaling was impractical and got advice from Sanchit from Elroy Air to scale inertially. We decided on a model of about ⅙ mass, with wingspan ⅓ of our intended ultralight. </p>

<p>We continued discussing our design with Elroy Air, and switched from a cloth-covered wing to foam ribs with fiberglass. Justin from Elroy Air advised us on how to lay the fiberglass, and how to use a hot wire cutter to cut the foam into molds. </p>

<p>I led a subteam on CFD simulations to corroborate XFLR5 — something I only had an old blog post to help me with. After digging through forums, I learned how to visualize case files from SimScale in <a href="https://drive.google.com/file/d/1m5QY9SMIaBCrfED60BS67JYj6k1tAoZP/view?usp=share_link">Paraview</a>, then sliced them to get CSVs at one cross section of the wing with lift at each point. I fitted the data to a polynomial curve using some <a href="https://drive.google.com/file/d/1LcVBqNtoHEwYyXmFJ5tVngB7KDWYKcDP/view?usp=drive_link">code</a>, and created a <a href="https://www.desmos.com/calculator/8vgsnm9b5t">desmos of chordwise lift distribution at different angles of attack</a>.</p>

<p>Meanwhile we bought and tested several spars. I calculated some test cases using the <a href="https://www.desmos.com/calculator/h9vwa9s367">Schrenk approximation</a> and helped on one of our <a href="https://drive.google.com/file/d/1lkHDjt0ariZeudr8uS1dc4pxs2d3gdmq/view?usp=share_link">first successful tests</a>. </p>

<p>At the end of the year, Nisu and I went to CNC the gussets for the spar at Kyle’s machine shop. He showed me how to use the Kitamura CNC — super cool!</p>
<h1 id="spring-2022">Spring 2022</h1>
<p>We began testing the new fiberglass wing design. I helped <a href="https://drive.google.com/file/d/1C97Wupr-saVal8OITtzaR1Z7-2wk9meD/view?usp=share_link">route the ribs</a> and wrap them in fiberglass, then used my CFD chordwise lift distributions to <a href="https://drive.google.com/file/d/1FfdAyQoDOGEZk3GSFvCiSsspllb_h6eK/view?usp=share_link">design tests for rib strength</a> — the rib held! </p>

<p>We also made our own hot wire cutter and cut foam molds, which was more difficult than expected because the long nichrome wire sagged, leading to wavy cuts. Our workaround was cutting using positive templates, over multiple passes.</p>

<p>The test wing’s fiberglass sagged between the ribs. We tried adding a bulkhead and a <a href="https://drive.google.com/file/d/14GhgY612uDqwMF0nZ5b20CccqQQ3axvQ/view?usp=sharing">top hat</a>, neither of which worked, so we increased the number of ribs and looped the fiberglass over the front edge. </p>

<p>Design finished up the remaining projects. I helped <a href="https://docs.google.com/document/d/1HEOBxepSLIzUaLjJYJ_-2s8HlEh-IQFoDz31NwB8JhY/edit#heading=h.m8878qhczrc7">design the landing gear</a>, mainly estimating forces. We used a carbon fiber leaf spring for the main gear, but the leaf spring for the front gear never arrived, so we built a rigid landing gear from square tubing instead.</p>

<p>For most of the spring I tried unsuccessfully to build a model of our plane in Gazebo. Our software lead eventually created one on a virtual machine, but it kept tilting inexplicably. I was able to get the <a href="https://drive.google.com/file/d/1LhrLawlncV8quy4YDdHcMKNMgVghcvwW/view?usp=share_link">model with joints working on a Mac</a>, but the code for aerodynamic characteristics wouldn’t compile — there was an error with qmake that I tried running by Fischer and Karan from Elroy Air, but none of their solutions or the ones on stack overflow worked. </p>

<p>In preparation for the flight, I calculated our <a href="https://drive.google.com/file/d/1Ff6tJTnoA4XfaLvQtB4KTSV4XUzSOuPg/view?usp=drive_link">v-speeds</a> and found them to be high but feasible. </p>
<h1 id="summer-2022">Summer 2022</h1>
<p>Leading up to the flight, Flight Club Aerospace focused entirely on fabrication. With the design finished, I helped build the fuselage and tail. We did taxi testing in Alameda on July 4. <a href="https://drive.google.com/file/d/1Pge2MZE2usN_OzzYYbFCvRLPBqXwhFs5/view?usp=sharing">Our plane hit a pothole and tipped over</a>, shattering the propeller and twisting the front landing gear. Thankfully, almost everything else was undamaged, so we were able to fix the landing gear, get a new propeller, and head to El Mirage Dry Lake for the test flight.</p>

<p>We first attempted a hop. The plane became airborne, but it landed too hard and the <a href="https://drive.google.com/file/d/1TGSrPd0Vl9qE9h4EzJe7_AaG3DdautYf/view?usp=share_link">front landing gear collapsed</a>. We weren’t able to fix the landing gear completely, so the plane wasn’t able to surpass stall speed on the ground. Our pilot tried a soft field takeoff, but the <a href="https://drive.google.com/file/d/1NpPMVe0HaN9Q0j8E1QdxkS8Wy9L6yCYc/view?usp=sharing">plane took off too early, stalled, and crashed</a>. At which point we were out of spare propellers. </p>

<p>We took a break after the test flight — most of us were traveling or, in my case, sick. </p>
<h1 id="fall-2022">Fall 2022</h1>
<p>Besides redesigning the front landing gear to be solid piping with rubber shock absorbers, we also decided to extend the fuselage for more tail control. We <a href="https://drive.google.com/file/d/1Ka3L2h7aMEeVTjnsNRjRaMG4rEq7EfiX/view?usp=share_link">redid XFLR5 simulations</a>, deciding on <a href="https://drive.google.com/file/d/1sVgVhuFCL88A0_cAa7v3d7OvkLt49oJJ/view?usp=share_link">a nearly twice as long fuselage</a> for better static and dynamic stability, which I CADed. We also decided to redo the leading edge of our wings. </p>

<p>After training the year’s recruits, I led a team to calculate the dimensions of the new strut and verify the strength of the spar. We self-studied statics using Jeff Hanson’s videos and made a <a href="https://www.desmos.com/calculator/qjtjnt1z3y">Desmos calculator</a> after locking ourselves in a library conference room to grind through the calculations for a few hours. We also <a href="https://www.desmos.com/calculator/8vrh70lfnl">checked the strength of two fuselage beams</a> that would be taking the force of the main landing gear and the pull of the struts. </p>

<p>We designed the <a href="https://drive.google.com/file/d/1JS_g7l_asH7uDBU_h3vAfgcKKCYD96_N/view?usp=share_link">gussets for the fuselage</a>, and got really good at sketching and using the sheet metal tool. Tedious stuff, but necessary. </p>
<h1 id="spring-2023">Spring 2023</h1>
<p>I led a team to redesign the control systems; I designed the system <a href="https://drive.google.com/file/d/1rYBxednVsJy2g39PkMllIySqLOKjy0q6/view?usp=share_link">for the elevator</a>, using Fusion’s sheet metal tool yet again. Though not the failure point during the first flight, they weren’t as strong as they should have been, and we wanted to make them more lightweight. </p>

<p>Flight Club’s focus switched to fabrication for the second half of the spring, so I concentrated on training design members in CFD using SimScale and helping them become more confident with CAD with <a href="https://docs.google.com/document/d/14V_MW4PRkgopTuY9Zf6HOuaY7tkp3JD6rGXswmN5gKQ/edit#heading=h.xzwts8l6g445">CAD challenges</a> (I had a lot of fun helping Jay and Gracie piece together the twist strip challenge). </p>

<p>I fixed some last-minute problems as they came up, including redesigning the <a href="https://drive.google.com/file/d/1FBLNZKUsOm3zWBk2qBn5zCnZGZ6GitxE/view?usp=drive_link">battery mount</a> to be more secure, and fixing the <a href="https://drive.google.com/file/d/1Vao852FrgrxxZiV1AtHGv5xNQoAGrIui/view?usp=drive_link">rudder control system</a>, which had an impossible-to-cut gusset. </p>
<h1 id="summer-2023">Summer 2023</h1>
<p>Because I attended SSP, I wasn’t able to attend the test flight. The plane crashed into a tent; it’s suspected that one of the control linkages broke, perhaps in addition to some lag in the system, but because the plane is almost completely destroyed no one’s sure what the failure was.</p>
<h1 id="fall-2023">Fall 2023</h1>
<p>Without a space to work out of, I focused on training new members and piecing together what happened during the flight. We decided to keep the same aircraft design, but improve fabrication techniques for a more reliable plane. We researched techniques to lay fiberglass as the leading edges on our previous wings sagged between the ribs. We also researched better hot wire cutter designs, eventually deciding on a design tensioned by weights, to ensure our molds would be even.</p>]]></content><author><name>Alex</name></author><category term="projects" /><summary type="html"><![CDATA[A group of about twenty high schoolers designing and building a pt. 103 ultralight aircraft! In my 3.5 years on the team as a design team member, and later, design co-lead, I worked on the design of a part 107 ultralight and the design and fabrication of a 12’ wingspan prototype.]]></summary></entry></feed>